STEP 13 - ROLLER SHUTTER ASSEMBLY
For this Step you will need:
- ROLLER SHUTTER
- SPRING ROLLER
- FRONT GUIDE ROLLER
- LARGE U BRACKET & AXEL
- AXLE PINES & RUBBER RINGS
- SMALL U BRACKET & COTTER PIN
- ROLLER SHUTTER FIX PLATE & SMALL SCREWS
- PREVIOUSLY ASSEMBLY CABINETRY
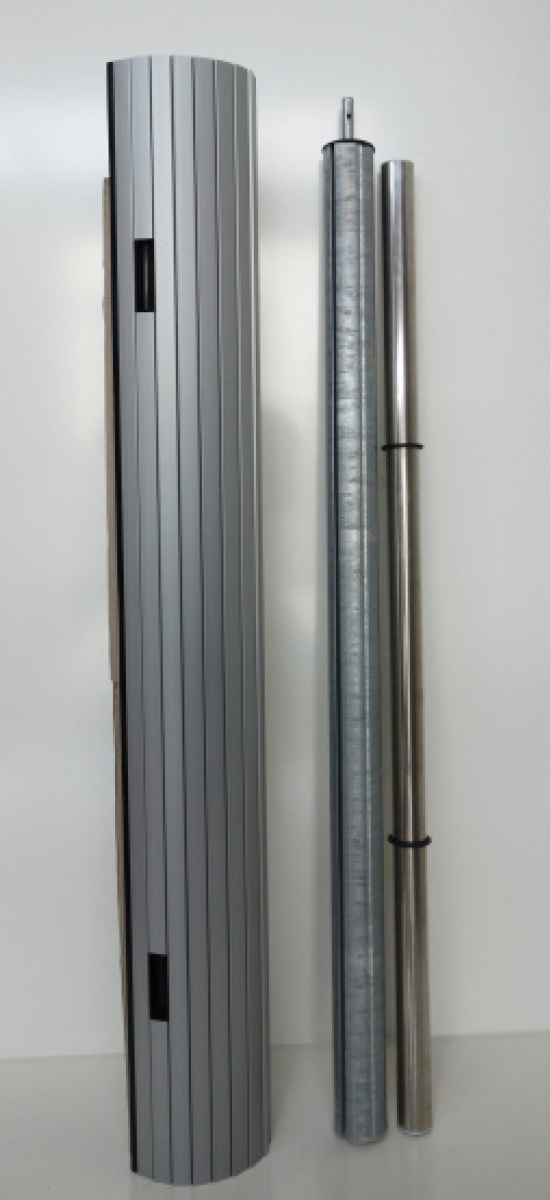
ROLLER SHUTTER, SPRING ROLLER & FRONT GUIDE ROLLER

LARGE U BRACKET AND AXLE
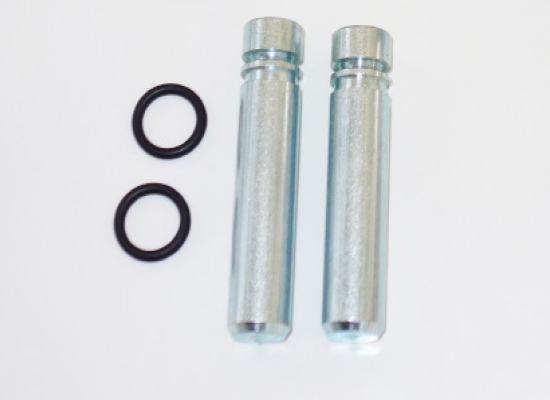
AXLE PINS and RUBBER RINGS
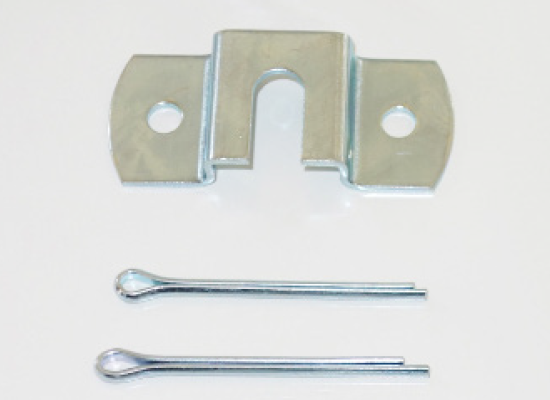
SMALL U BRACKET and COTTER PIN
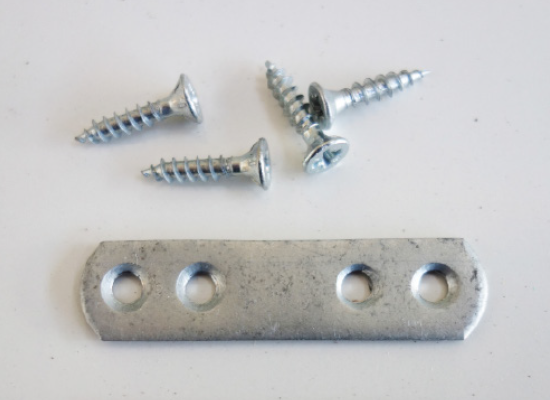
ROLLER SHUTTER FIX PLATE & SCREWS
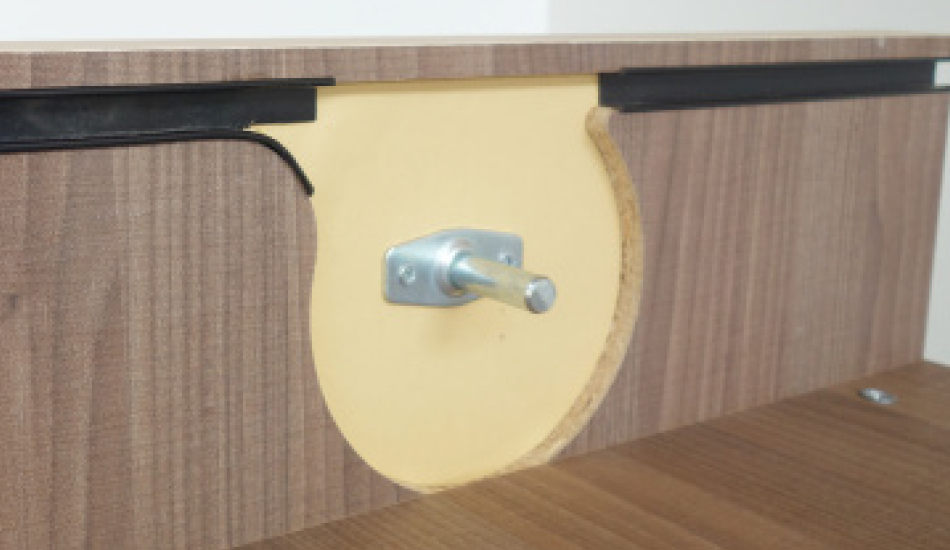
Screw the AXLE PLATE into the pre-drilled holes on the left hand SIDE PANEL.
Then screw the larger U BRACKET into the pre-drilled holes on the MIDDLE VERTICAL PANEL.
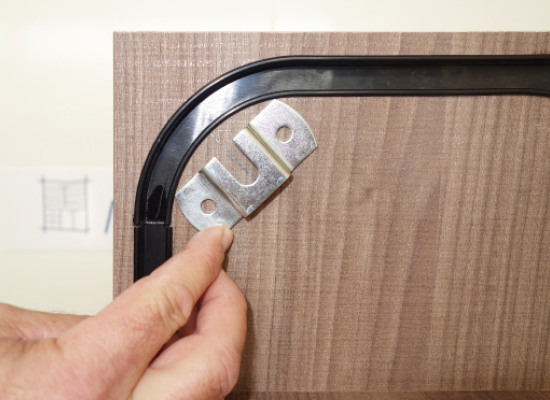
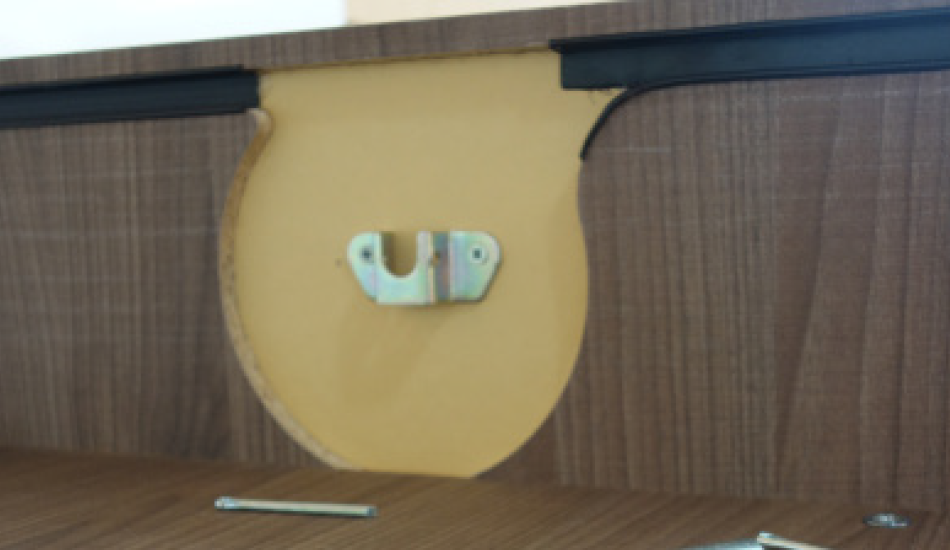
A smaller U BRACKET is installed on either side of the cabinet to hold the FRONT GUIDE ROLLER as follows.
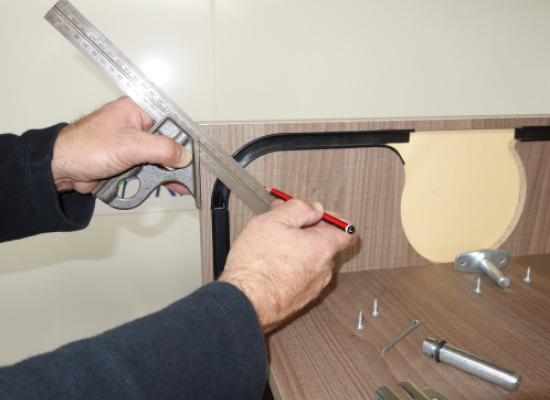
Using the COMBINATION SQUARE draw a pencil line below the plastic ROLLER SHUTTER guide track and in-line with the top corner of the MIDDLE VERTICAL PANEL marking the centre line for the U BRACKET.
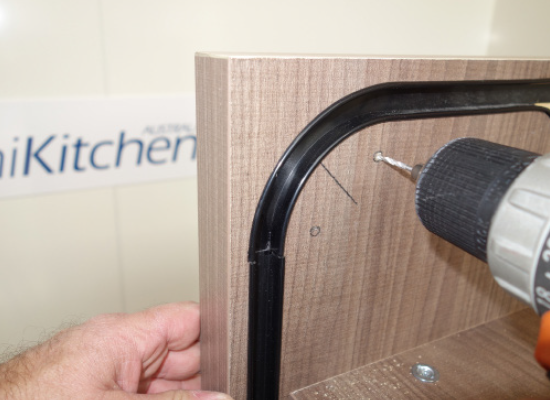
Mark the hole centres and use a 2.5mm DRILL BIT and drill the two holes.
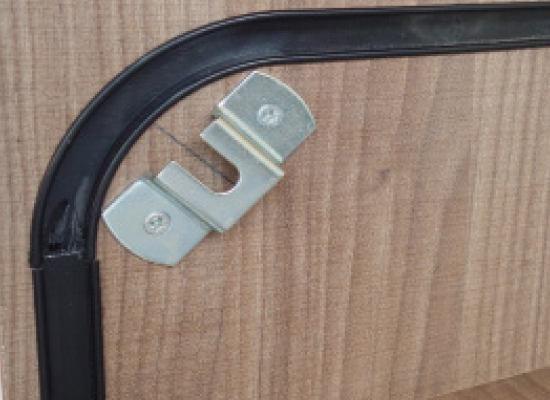
Attach the U BRACKET then repeat the above process on the opposite side of the cabinet.
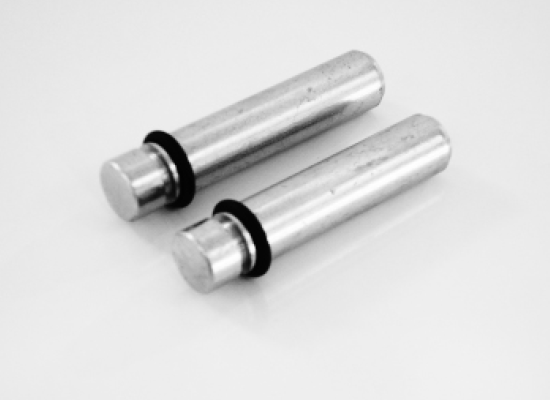
Select the AXLE PINS for the FRONT GUIDE ROLLER and place a RUBBER O’RING into the second groove of each AXLE PIN.
Insert an AXLE PIN into either end of the FRONT GUIDE ROLLER.
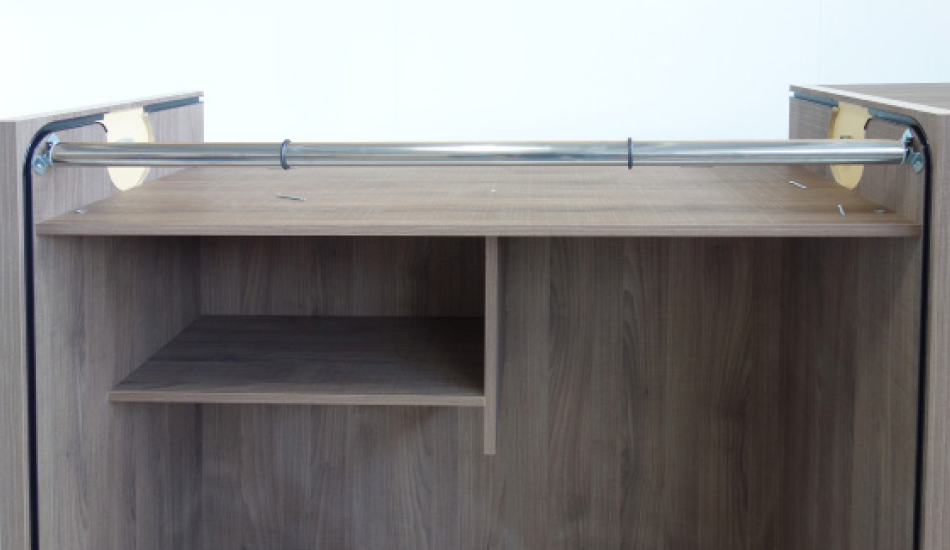
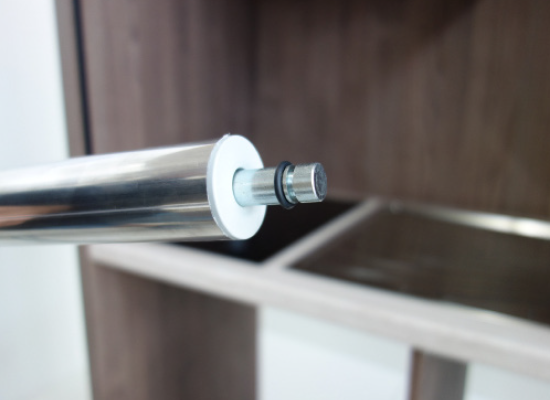
Place the FRONT GUIDE ROLLER into position in the U BRACKETS.

Secure the FRONT GUIDE ROLLER in the U BRACKETS by inserting the COTTER PIN through the holes in the U BRACKET then bend each COTTER PIN once it is in position.
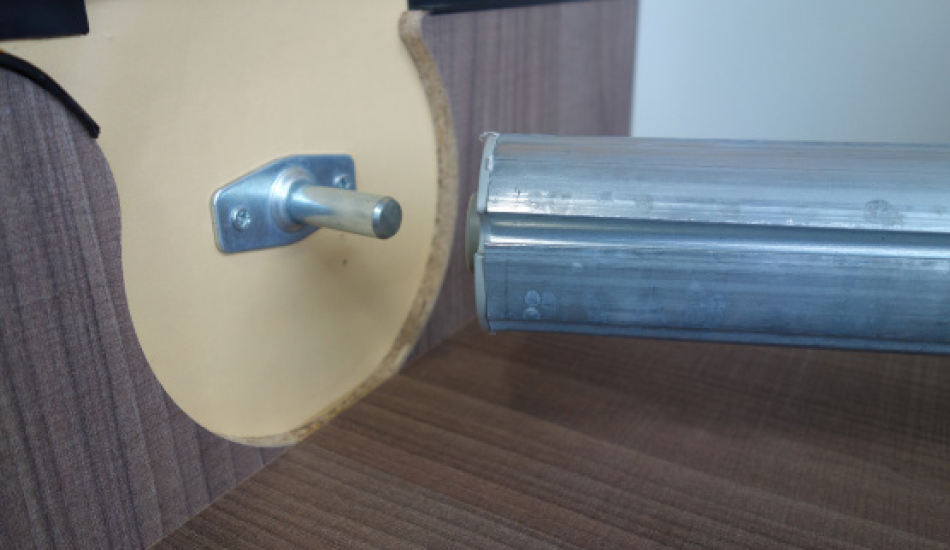
Place the female end of the SPRING ROLLER onto the AXLE PLATE and the opposite end into the U BRACKET.
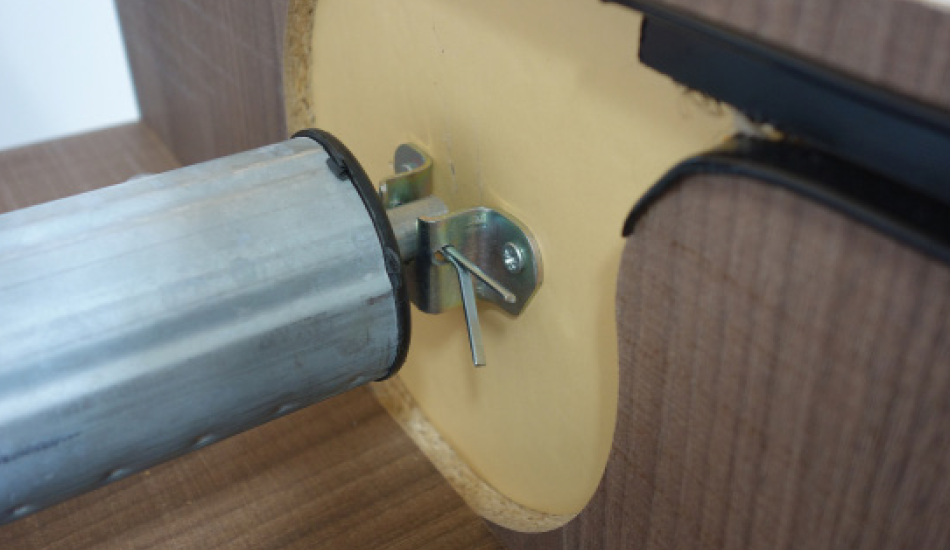
Align the holes in the AXLE with those in the U BRACKET, place a COTTER PIN through the holes and bend on end of the COTTER PIN.

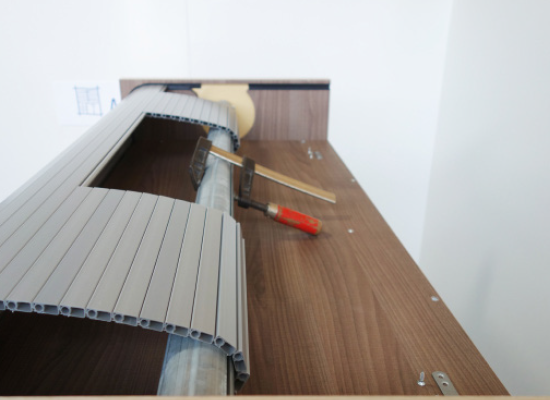
To do this you rotate the SPRING ROLLER. Working from behind the MiniKitchen rotate the SPRING ROLLER towards the front of the MiniKitchen cabinet for SEVEN complete rotations. Hold the SPRING ROLLER with one hand and attach the G CLAMP to the SPRING ROLLER to avoid the SPRING ROLLER unwinding and losing tension.
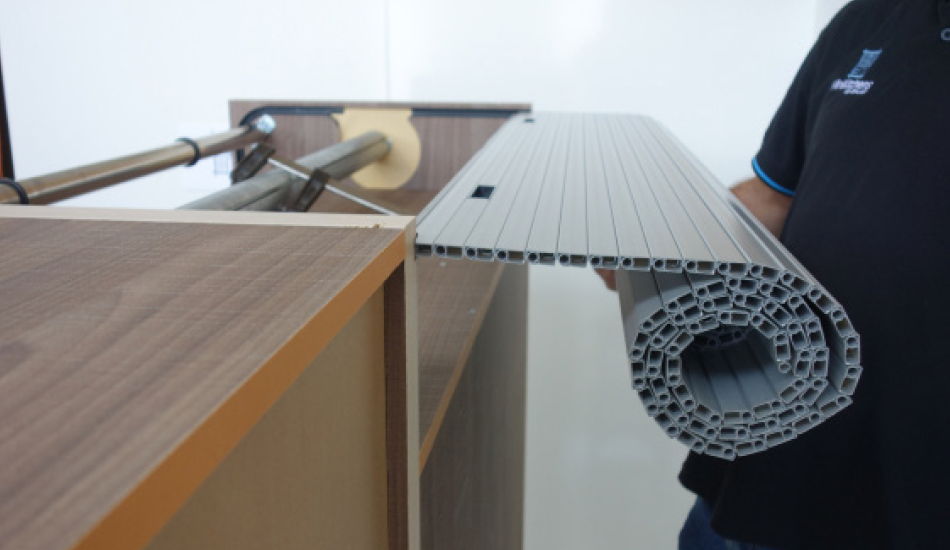
From the back of the MiniKitchen cabinet feed the end of the ROLLER SHUTTER into the plastic GUIDE TRACKS. If ROLLER SHUTTER is not running smoothly then spray the GUIDE TRACKS with a little silicon spray.
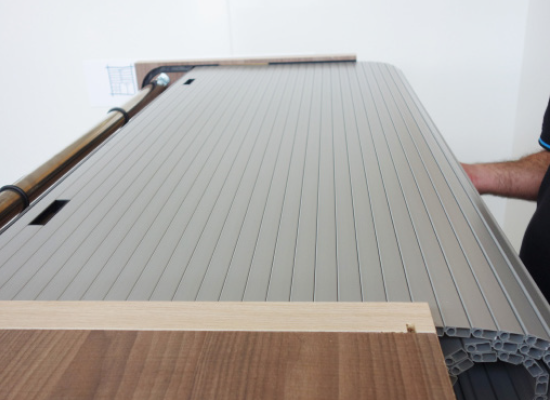
Continue feeding until the ROLLER SHUTTER touches the BENCH TOP.
The ends of the ROLLER SHUTTER now need to be attached to the SPRING ROLLER.
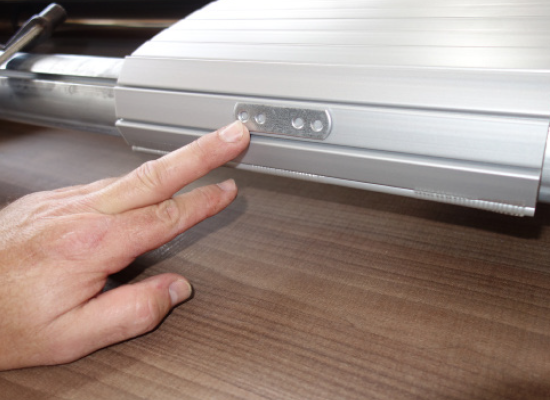
When the ends of the ROLLER SHUTTER reach the SPRING ROLLER. Place a four hole ATTACHING BRACKET in position and mark the two outside holes ready for drilling.
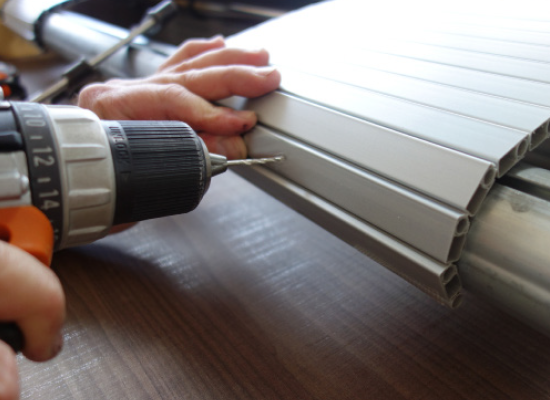
Using a 2.5mm DRILL BIT drill the holes and attach the ATTACHING BRACKET firmly in place. Repeat this step on the opposite side.
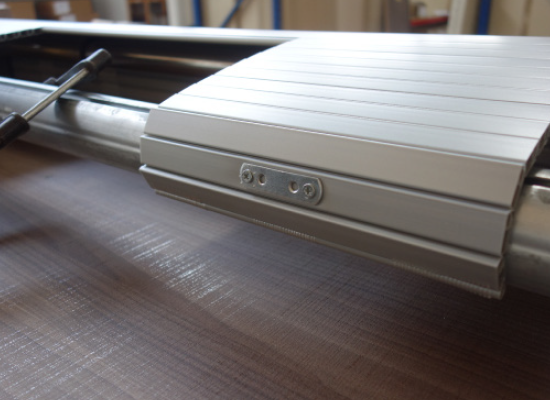
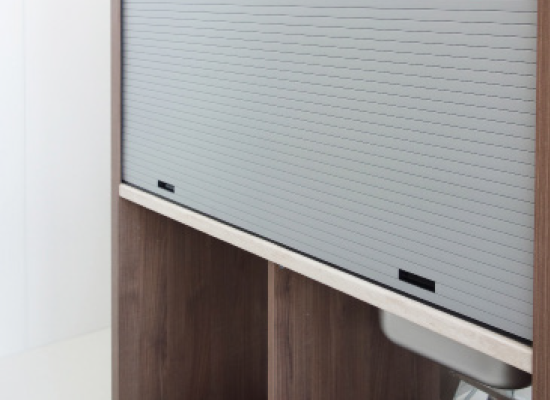
Release the G CLAMP and the ROLLER SHUTTER is now complete.