STEP FOUR - FITTING THE STAINLESS STEEL SINK INSERT
For this Step you will need:
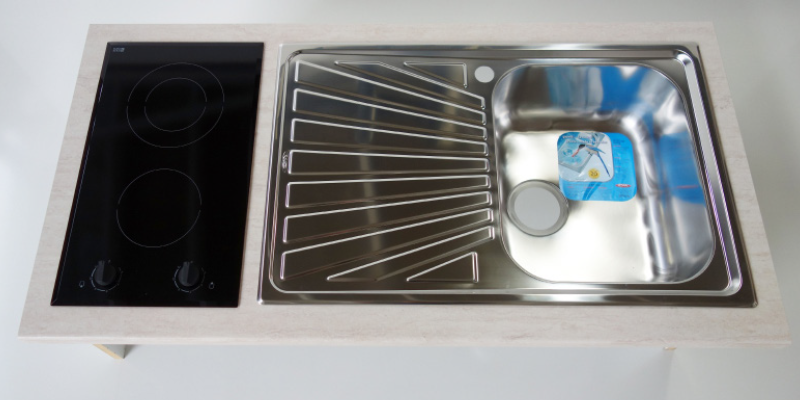
- WORKING TOP (BENCH TOP)
- STAINLESS STEEL SINK INSERT
- RETAINING CLIPS
- RUBBER SEALING STRIP
- WET AREA SILICONE SEALANT
- SOAPY WATER MIX
- WOODEN STICK
- COMBINATION SQUARE
- WOODEN FLAT SQUARE STICK (OR SIMILAR)
At this stage you have choice of either fitting the STAINLESS STEEL SINK INSERT to the BENCHTOP before the BENCHTOP is fitted to the MiniKitchen or leave it until after the BENCHTOP it is assembled. Here we are going to fit the STAINLESS STEEL SINK INSERT first.
Please note: The photos in this installation show a cut-out for a Cooktop. However, in MiniKitchens models the cut-out does not exist. This has been deleted because some clients do not require a Cooktop. All Cooktops come with a cut-out template enabling the customer to complete this task and should be installed according to manufacturers recommendations.
Select the BENCHTOP/WORKING TOP panel.
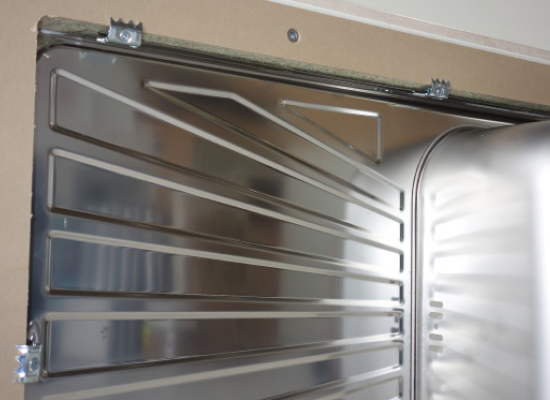
Unpack the STAINLESS STEEL SINK INSERT assembly componants.
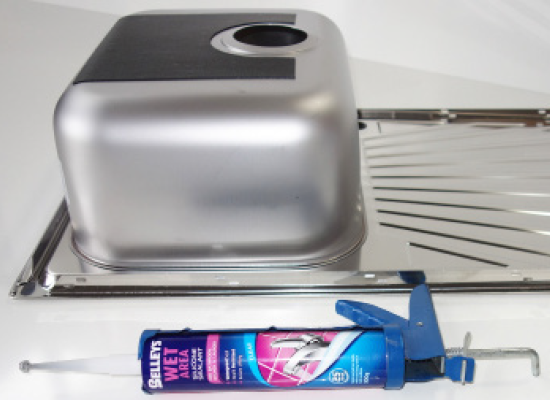
STAINLESS STEEL SINK INSERT
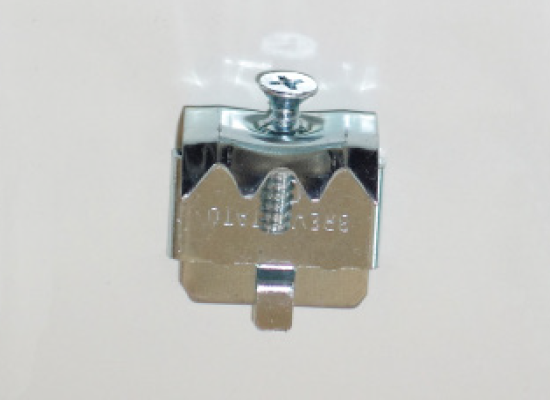
RETAINING CLIPS
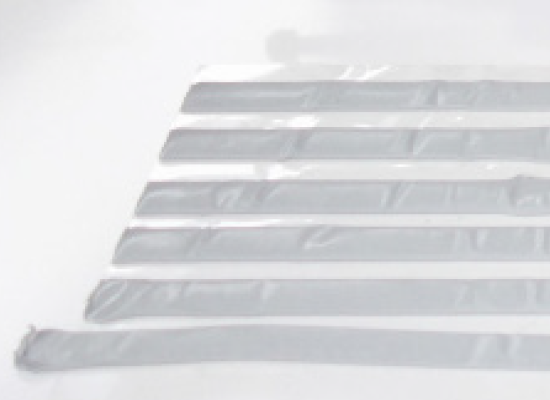
RUBBER SEALING STRIP
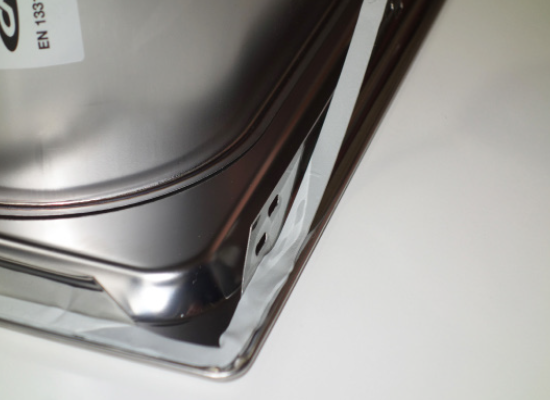
Turn the STAINLESS STEEL SINK INSERT upside down and press the RUBBER SEALING STRIP around perimeter of the STAINLESS STEEL SINK INSERT. Be careful not to stretch the RUBBER SEALING STRIP as you remove it from the backing sheet as it may become hard to manage.
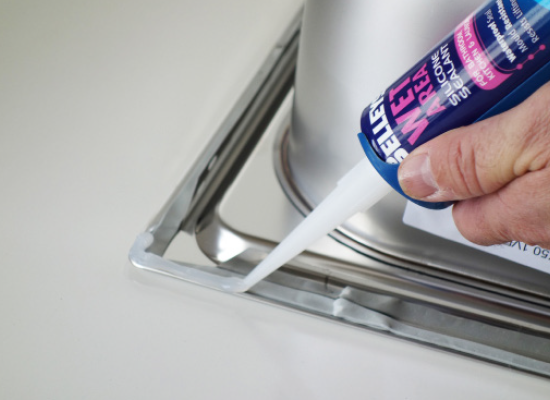
Apply a bead of WET AREA SILICONE SEALANT around the entire perimeter of the STAINLESS STEEL SINK INSERT beside the RUBBER SEALING STRIP.
Place the BENCHTOP face side up on a table and support both ends at a height that will enable you to work from underneath to insert and tighten the RETAINING CLIPS.
Carefully lift the STAINLESS STEEL SINK INSERT and place it into position in the BENCHTOP. This is best done by lifting with one hand through the drain hole and the other steadying the other end of the sink. Take special care not to spread the silicone.
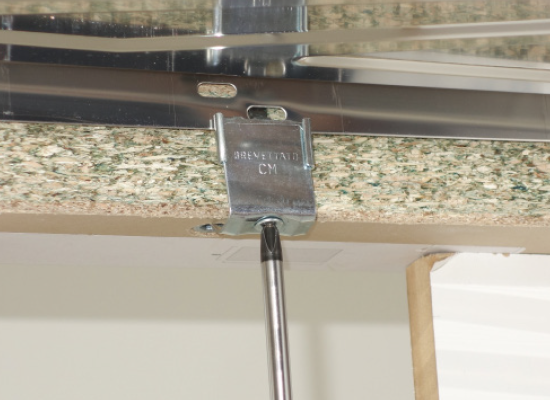
Once the STAINLESS STEEL SINK INSERT is in place, working from underneath, loosely tighten the outside left and right RETAINING CLIPS to keep the STAINLESS STEEL SINK INSERT in position . Do not overtighten at this stage as you may need to realign the SINK.
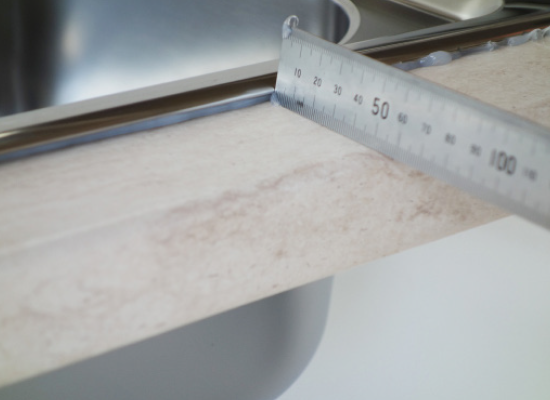
Measure the front edge of the STAINLESS STEEL SINK INSERT near each end to ensure that it is parrallel with the front edge of the BENCHTOP.
When you are satisfied that everything is parallel firmly tighten all of the RETAINING CLIPS.
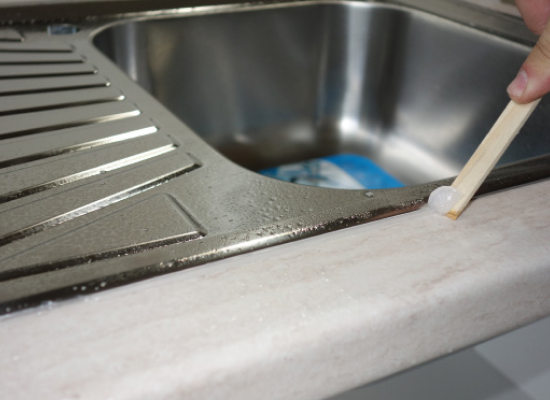
Excess silicone will now be evident around all edges of the STAINLESS STEEL SINK INSERT. Spray all of the silicone edges with the soap-water mix which will prevent the silicone adhering to unwanted areas. Remove all of the excess silicone with WOODEN STICK (or similar) and the STAINLESS STEEL SINK INSERT is now fully sealed.